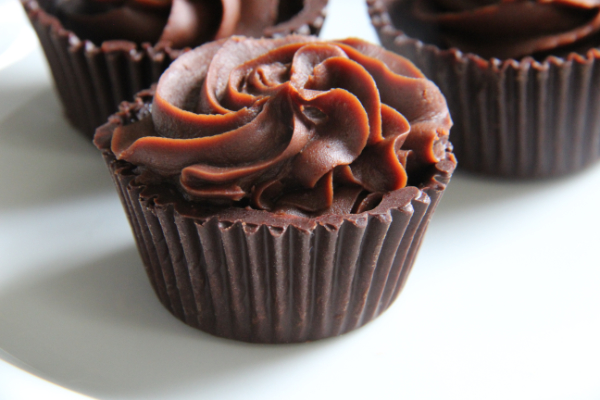
Our daughter once gave us a box of imported chocolate mini cups, which made any filling an instant dessert. Turns out, if you can melt chocolate you can make them yourself. Paint the inside of small paper baking cups with melted bittersweet chocolate, let harden, then strip off the paper. The crisp accordion pleats make these cups look so much like paper liners, your guests will try to peel them off. It’s such fun—the opposite of fake food. It’s both a craft project and a dessert.
Better yet, fill these petite cups with mascarpone chocolate cream and you get a dreamy, deep chocolate that melts away with each heavenly bite. Mascarpone—the milder and creamier cousin of cream cheese—whips into a mousse-like filling with a soft truffle-like richness.
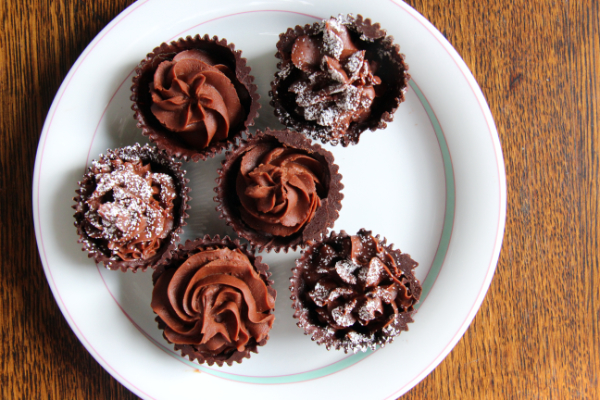
Voila—you have a no-bake, three ingredient, gluten-free, eggless, mega-chocolate whammy of a dessert. Make the chocolate mini cups ahead and keep a little tub of mascarpone in your freezer. Now on short notice you can whip up this trick of a treat for the chocolate lovers in your life.
Chocolate Whipped Mascarpone in Dark Chocolate Mini Cups
For the cups:
- 3 ½ ounces dark chocolate chips or semisweet chocolate
- Mini-muffin paper or silicone baking cups
For the chocolate mascarpone filling:
- 3 ½ ounces dark chocolate chips or semisweet chocolate, or more to taste
- 2 teaspoons vanilla extract
- 1 cup mascarpone cheese, room temperature
- Confectioner’s sugar or cocoa powder to dust, optional
For the cups:
- Line a cookie sheet with parchment or wax paper.
- Melt 3 ½ ounces of chocolate in the microwave until almost melted, then stir until smooth. Thickly paint the insides of a mini baking cup (paper or silicone) using a brush or the back of a spoon. Turn the cup upside down on the cookie sheet and let set. Repeat for a total of about 20 cups. Refrigerate to speed up hardening.
- When chocolate has hardened, carefully peel away the paper or silicone cups. If sides are too thin or fragile to peel off the baking cups, apply another coat of chocolate and let set before peeling. Store cups at room temperature or in the refrigerator.
For chocolate mascarpone filling:
- Beat the mascarpone in a bowl. Melt the rest of the chocolate and add it with the vanilla. If desired, add more melted chocolate to taste. Beat until smooth.
- If too thin to pipe, refrigerate for a few minutes. Whip again if necessary to get to piping consistency.
- Using a pastry bag with a large star tip, pipe the filling into the cups. You may have extra cups. Refrigerate filled cups.
- Serve cold or remove cups from refrigerator about 1 hour before serving. Optional: Dust with cocoa powder or confectioner’s sugar.


2 Comments
Joe Discenza
I made these Monday for Nicole, and they’re delicious (and easy)! I need more practice at coating the cups (and even the ones that have good walls are hard to peel the paper from), and I learned after mixing the filling that our pastry bag was not compatible with the tips I could find (tips too small for the hole), but I persevered. Also, Nicole did not care how kindergarten they looked. 😉
Diane Brody
Hey Joe,
Thanks so much for trying them! I bought mini silicone liners and they worked great, maybe better than the paper. You really have to slather on the chocolate to keep the walls strong. I can’t speak to the kindergarten thing, though—I’m sure they looked great.
Thanks for reporting back and love to you all!
Diane