In the baking aisle at Stop and Shop many years ago I passed by a young mother with two small children. She was intently surveying the shelves when her little girl reached for a tub of ready-made fudge frosting and begged, “Mommy, can we get this?”
“Honey,” she snapped in a reprimanding tone, “if I’m going to go through all the trouble of baking a cake, I’m not going to put that shit all over it.”
While her choice of words led me to question her parenting style, the wisdom of them has stuck with me.
Yes, it’s all too easy to skimp on finishing touches. Consider the venerable hamburger. Carefully crafted and perfectly grilled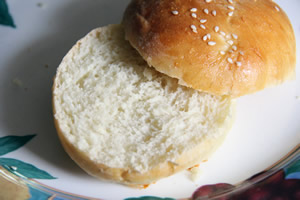 burgers often end up in squishy, boring supermarket buns that don’t meet anyone’s standards for sandwich bread. Restaurants wisely showcase their high-end burgers in golden brioche from a bakery.
Now here’s an easy and satisfying upgrade that lets you bypass both the supermarket bread aisle and the bakery. These simple, no-knead buns have the strength, fluffiness and flavor your tasty burgers deserve. Like brioche buns, they are soft, eggy and slightly sweet, but without all the butter.
They pretty much make themselves. Mix up the dough in a couple of minutes, let it sit, and then refrigerate. Whenever you’re ready, remove from the fridge, form buns, wait until they get a little poofy, and bake.
Now I must confess that this is a variation of our No-Knead Challah Sandwich Loaf, my favorite foolproof bread. Similar in taste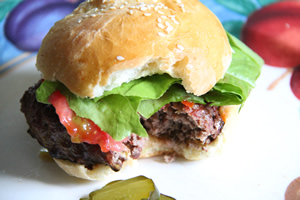 and texture to brioche, this dough makes more than just great sandwich bread and toast. I often add chopped raisins and a hefty filling of cinnamon sugar to make cinnamon swirl bread. Why it took me this long to turn it into Better-Than-Brioche Burger Buns beats me.
So if you’re going to go through all the trouble of making your signature burgers, bake up some signature buns to go with them. You’ll never settle for those $#@& packaged buns again.
Better-Than-Brioche Burger Buns
Makes 12 buns, each about 3½-4 inches in diameter, from about 2 pounds of dough
- 7/8 cup water, lukewarm*
- 1½ teaspoons instant yeast (SAF Gold works best with sweet doughs like this. Available from King Arthur Baking and others.)
- 1½ teaspoons kosher salt
- 2 eggs, lightly beaten
- ¼ cup oil
- ¼ cup honey
- 3½ cups bread flour or all-purpose
*We recommend bread flour, which may need about 1/8-¼ cup more water than all-purpose flour to keep it stretchy.
Glaze:
- 1 egg beaten with one tablespoon of water
- Sesame seeds (optional)
- Stir together water, yeast, salt, lightly beaten eggs, oil and honey in a 4-quart bowl using a wooden spoon or a dough whisk (my preference).
- Mix in flour. The dough should be moist and tacky, and look like a gloppy mass. Mixing will only take a minute or two. If you’re using bread flour, you may need to use a little extra water to keep it stretchy.
- Cover bowl completely with plastic wrap. Let sit at room temperature until the dough rises and slightly collapses or flattens, about 2 hours. Use the dough now, or refrigerate it for up to five days. Besides its convenience, cold dough right out of the fridge can also be easier to handle.
- When ready to bake, line baking sheets with parchment paper. Dust dough with a little flour, remove from bowl, and cut into 12 equal pieces on a lightly floured counter. Roll and stretch each piece into a rope about 9 or 10 inches long, dusting lightly with flour if too sticky to handle. Tie each rope into a knot and tuck under the ends. The knots may disappear as the buns rise, but that’s okay. Tying the dough is just a simple way of forming the buns. Place buns on the prepared baking sheets, flattening just a little so that each is about 3 inches in diameter. Allow room for a little spread.
- Let rise for 90 minutes or until light and airy. They may not quite double in size. Refrigerated dough will probably need more rising time. In the meantime, preheat oven to 350°.
- Before putting them into the oven, brush the tops with the egg wash. If you want, sprinkle with sesame seeds.
- Bake about 15 minutes, until tops are light golden brown and interior reaches 190° on an instant-read thermometer. Let cool on rack a few minutes before slicing. Leftover buns freeze well.




2 Comments
Kathy H.
Lovely recipe!
Wet dough is a little tricky, which I managed with frequent light flour dustings, use of a bench tool vs hands for the bulk (undivided) dough, and running the “snakes” thru a pile of flour while shaping.
Next time I will also tare my mixing/rising bowl, and weigh the mixture, to help create more even portions without increased handling.
My oven won’t accommodate two pans on a rack, so I rotated halfway thru the initial baking time, and added a few minutes to get a darker color. An egg wash with no water or less water might achieve the same thing, without adding oven time.
Tasty. Fun. Doable. Thanks!
Diane Brody
Hey Kathy,
Thank you for making these and for your comments! It’s so great to get your feedback.
I’ve gotten other comments that the dough is too sticky (it may just be because this is summer—humidity makes a big difference), so I’ve amended the recipe to include lightly dusting the ropes. There will be stickiness, though, since this no-knead dough is naturally well hydrated, and frankly I don’t care if the knots disappear. I knot the dough mostly because it’s an easy way to form them into nicely shaped buns.
Yes, a scale is a good idea and I use it for just the reason you mention.
For the dozen, I bake on two racks, but when I try to rotate the trays the buns tend to slip off. So I end up baking some buns longer than others.
I usually make just six, though, and make a loaf of bread (8″ x 4″ x 2 1/2″ pan) with the other half of the dough, which I store in the fridge for up to a few days.
Thanks again for making these—the pictures you posted on Facebook look fabulous, better than mine!
I’m always looking for recipes with good stories, so please let me know if you’d like to share anything. Please email me whenever you feel like it at recipephany@longlast.com and keep in touch!
Thanks again,
Diane